How I Revamped My Server Infrastructure
Original Setup and Where I am Now
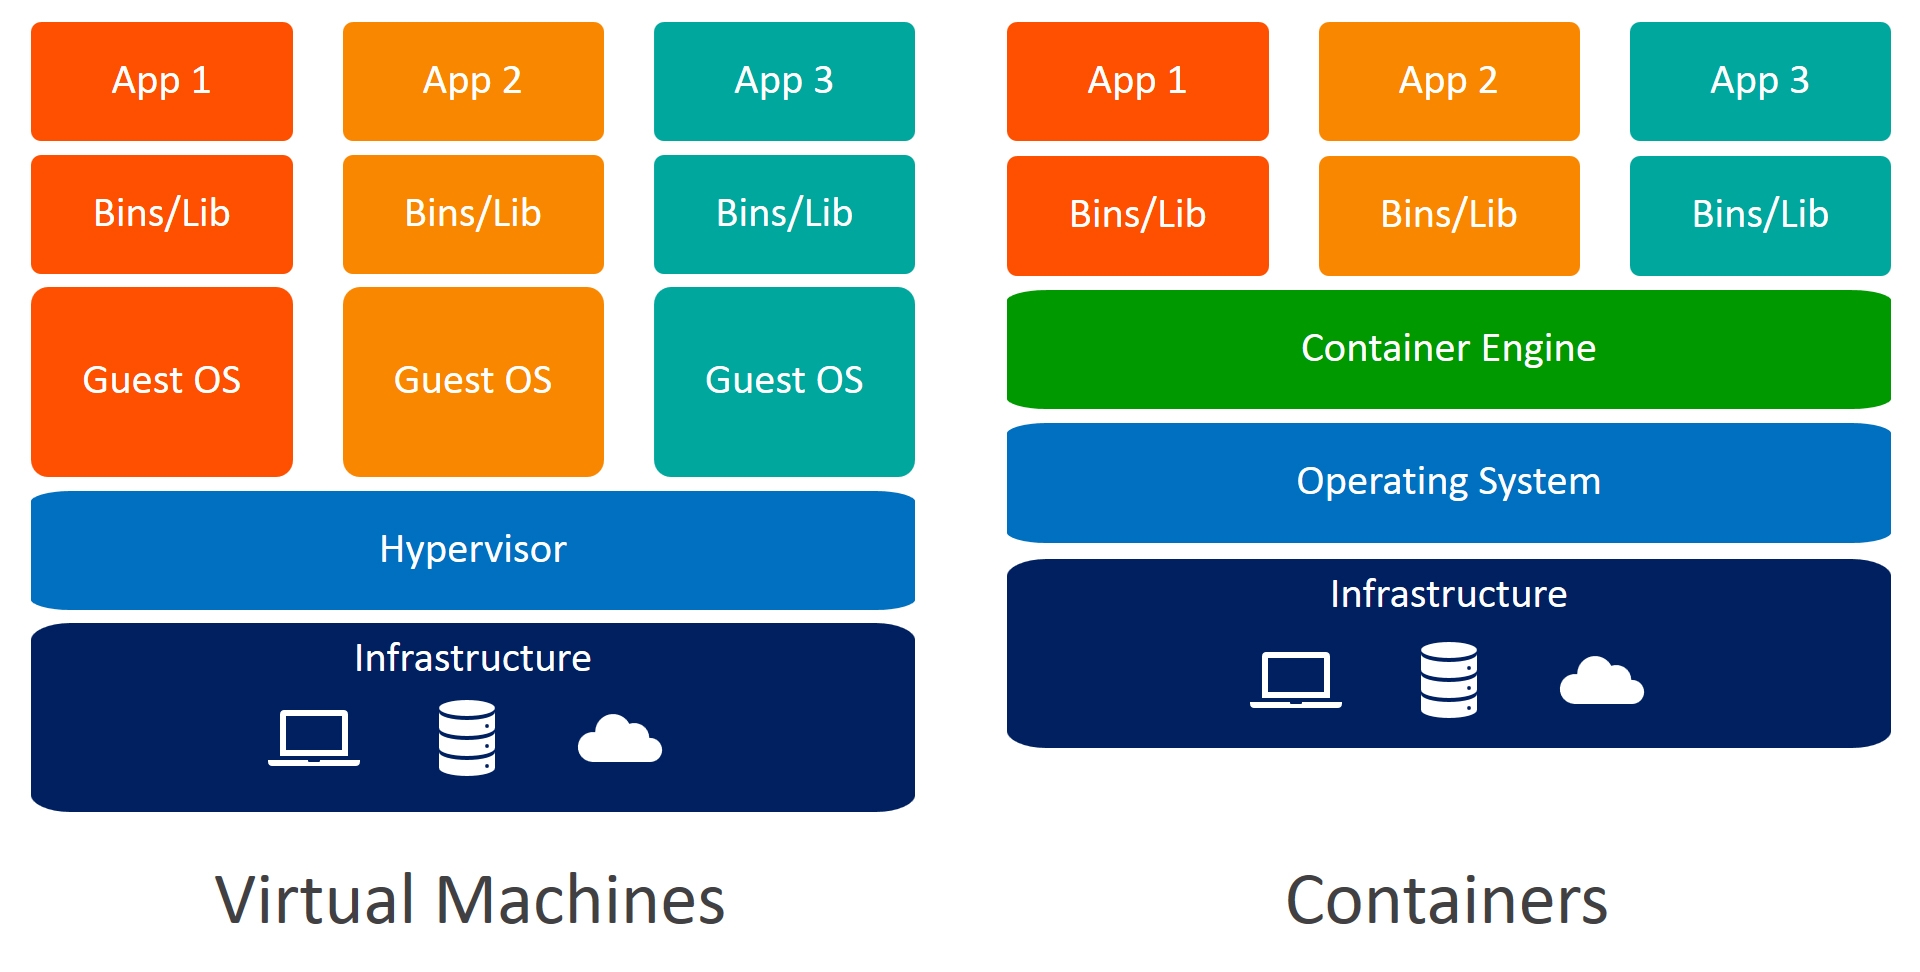
Until recently, Unraid had been my preferred operating system for my server. Unraid is renowned for its beginner-friendly approach and impressive WebUI, which made it an ideal fit for me when I was just getting started with Linux servers. However, a significant drawback I encountered was that it didn’t allow for a deeper understanding of essential Linux concepts. It was simple enough to follow guides and get things up and running, but I felt that I was missing out on the opportunity to truly grasp how these elements functioned. Eventually, I migrated to using a focus-built hypervisor, utilizing Linux virtual machines for my services. Compared to an all-in-one solution, this approach gave me more freedom and helped further my knowledge of Linux and system administration.
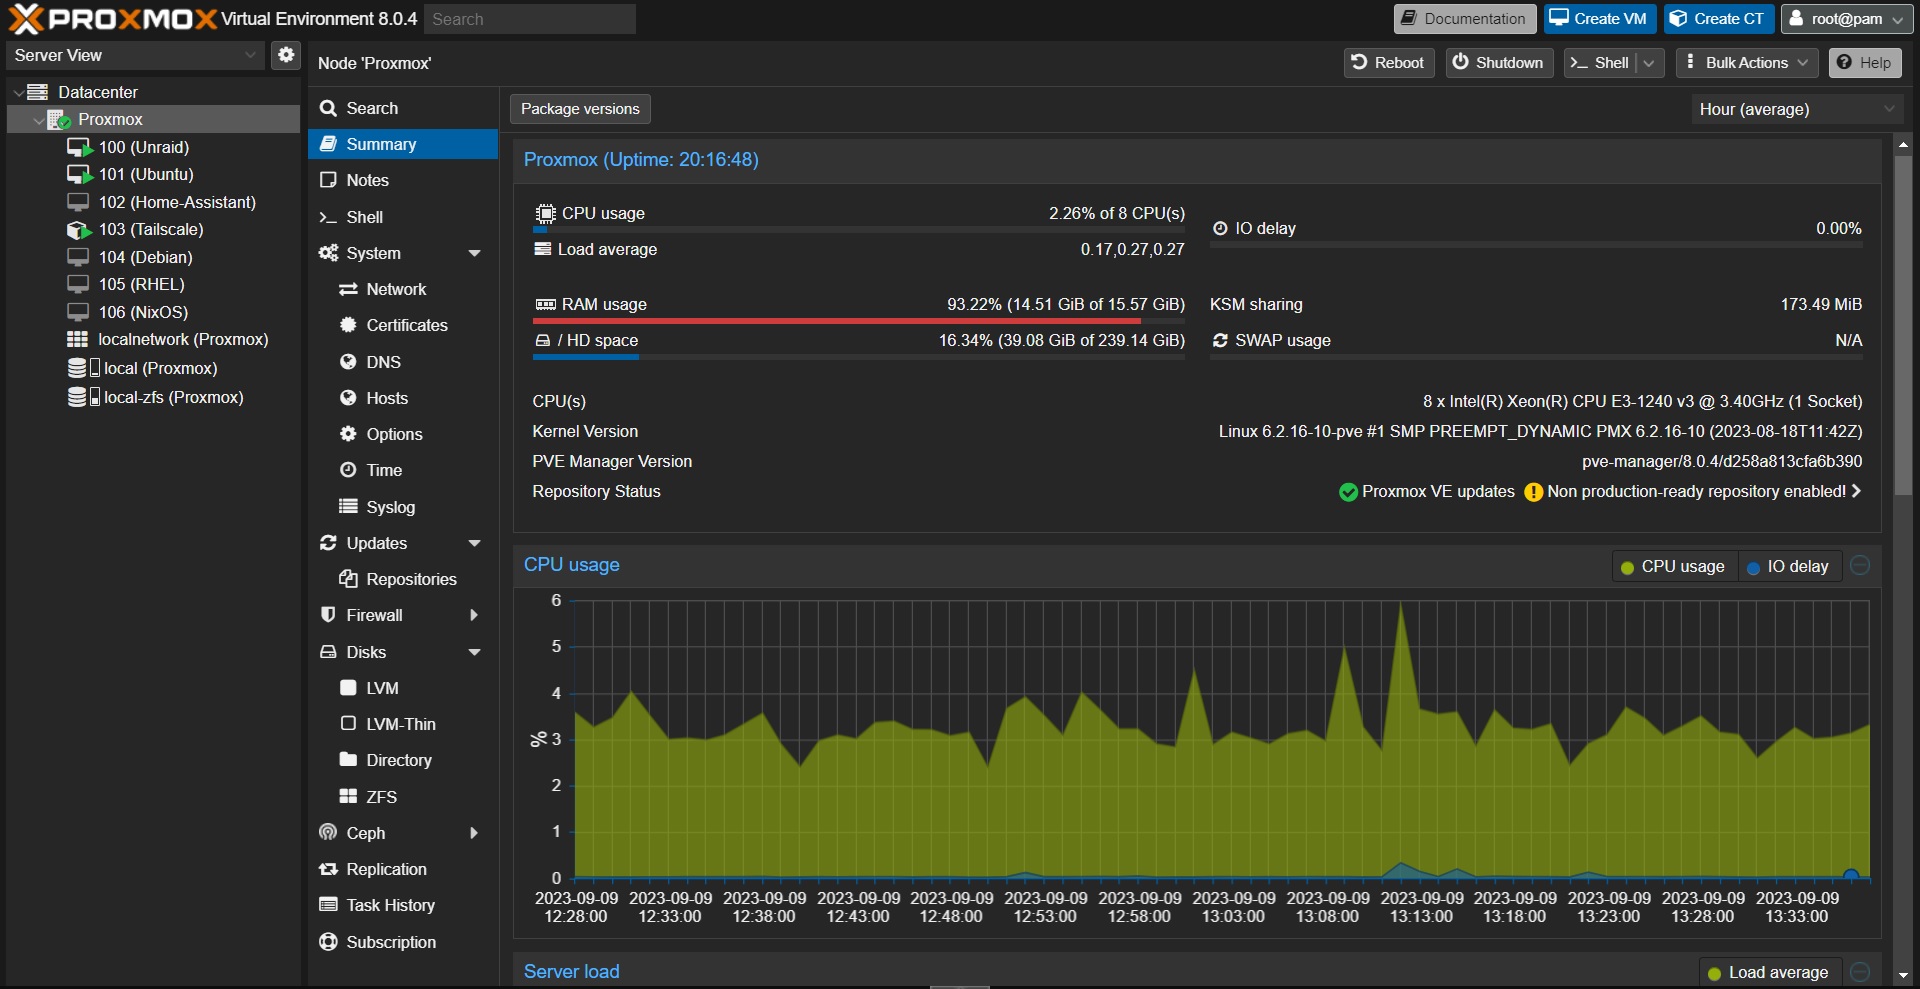
Proxmox
The most important choice I made was my hypervisor as this would be the backbone of my entire setup. My initial shortlist featured two contenders, Proxmox and VMware ESXi. Ultimately, I opted for Proxmox primarily due to its less restrictive licensing terms and its widespread popularity within the homelab community.
Storage VM
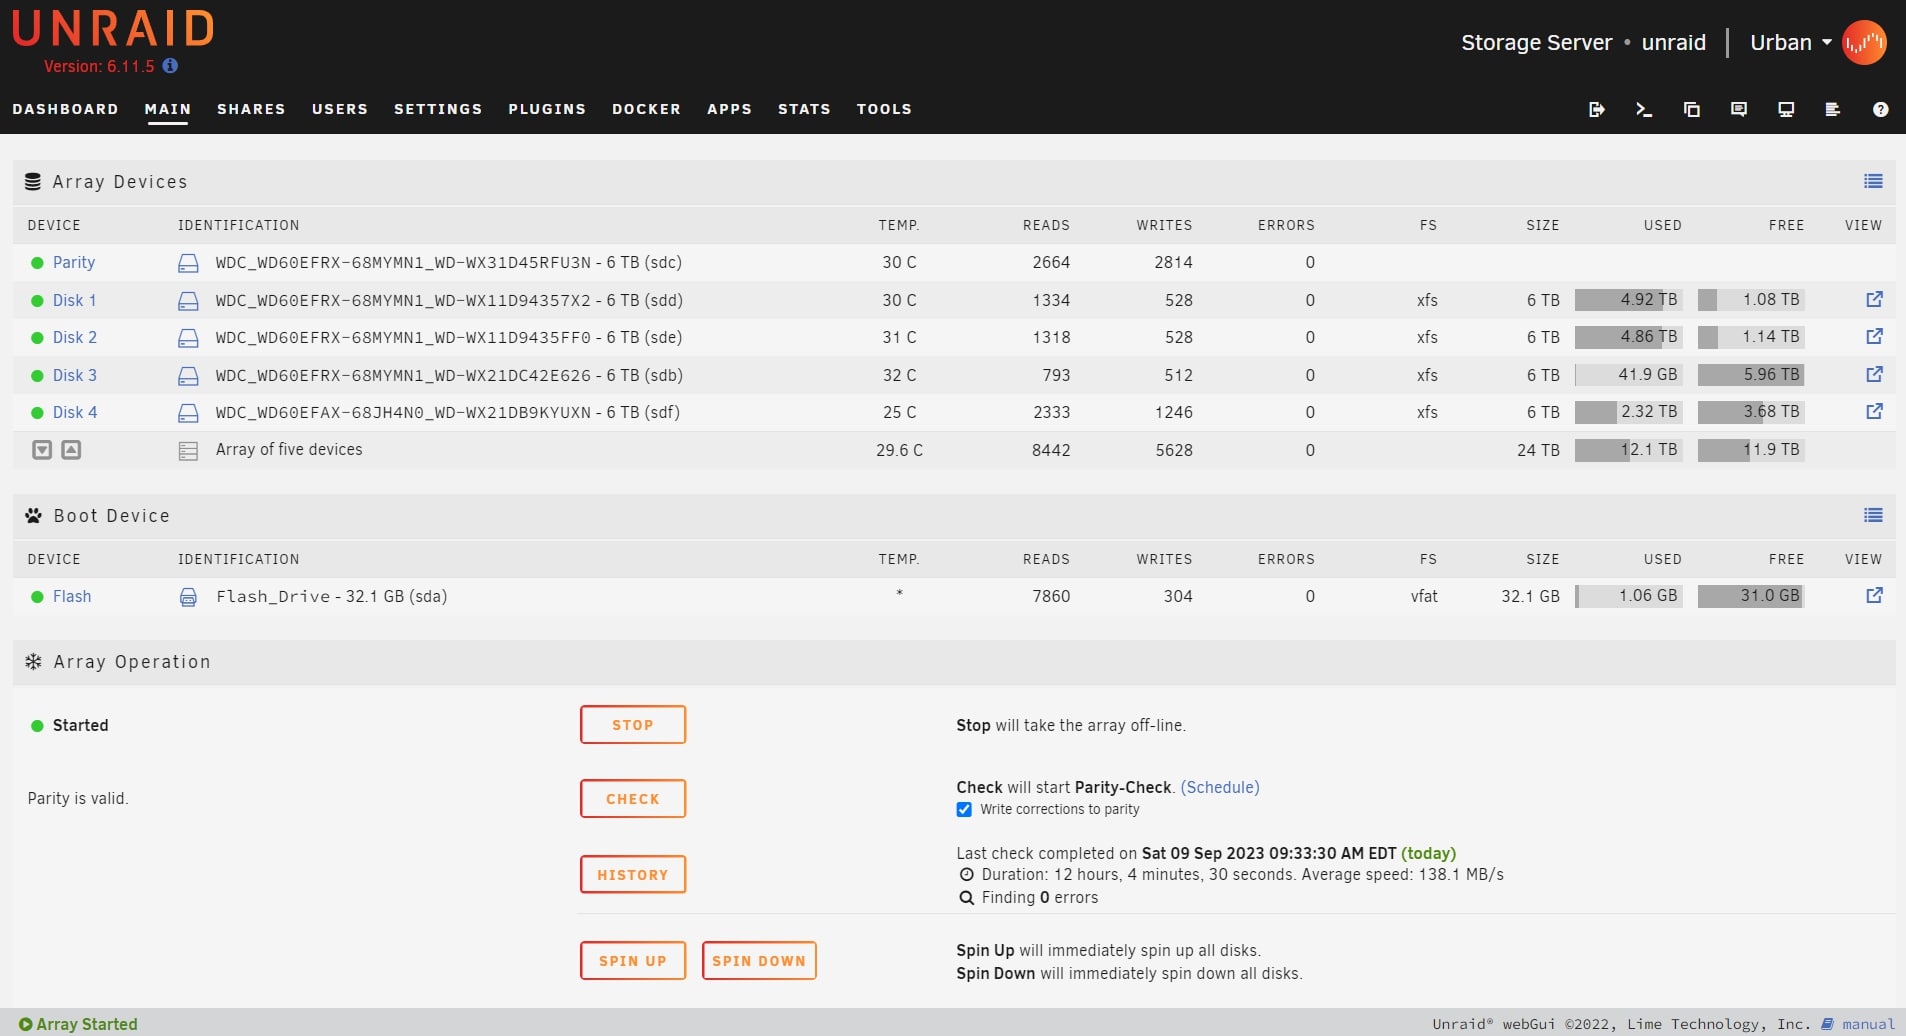
Currently, my mass storage setup consists of an array comprising five 6TB WD Red drives, with one of them serving as a dedicated parity drive. These drives are connected to an LSI HBA card that has been modified to operate in IT mode. This modification eliminates the card’s RAID functionality, but it grants the host operating system visibility into each individual drive, which is precisely what’s needed for a JBOD Array. For now, I have kept the array intact on Unraid but have transitioned to running it as a VM on Proxmox rather than on bare metal. The process was straightforward as Unraid boots the OS from a USB drive, allowing me to easily pass the USB drive through to the VM. Nevertheless, this is considered a temporary solution, as my long-term plan is to migrate to either a combination of SnapRAID and MergerFS or TrueNAS for a more robust solution utilizing ZFS.
Ubuntu VM
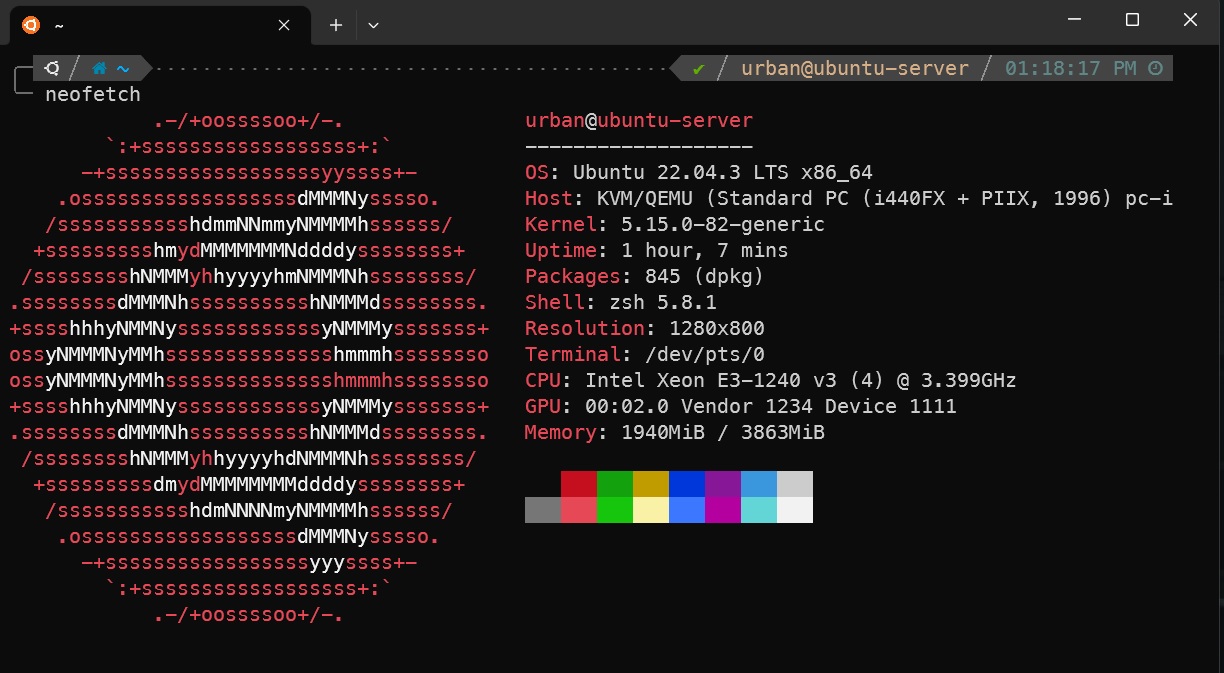
The primary function of my Ubuntu Server VM is to serve as a Docker host for a variety of services. My interest in containerization traces back to my original Unraid server experience. The ability to effortlessly deploy and manage services within a secure and isolated environment has proved extremely beneficial. My preference is to opt for containerization whenever feasible, reserving the use of VMs for critical scenarios. Currently, among the containers I run, you’ll find Plex, Syncthing, and Uptime-Kuma with more to be added.
Remote Access
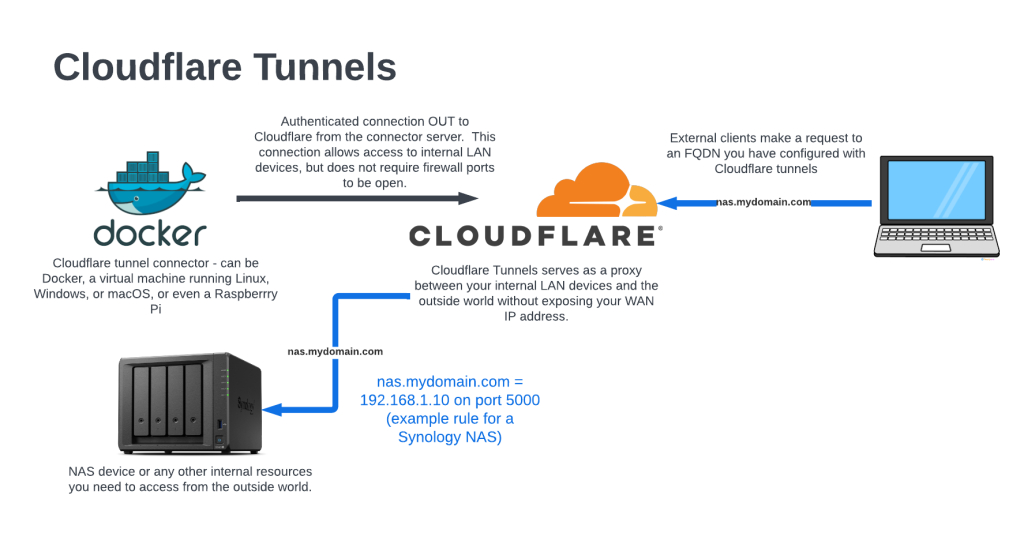
While having well-established infrastructure in place is paramount, the absence of remote access capabilities significantly restricts its potential. Nevertheless, there exists a significant challenge tied to remote access, specifically concerning security. Opening multiple ports on your router and exposing your network to the internet is a risk that should be avoided. Fortunately, there are alternative solutions to address this concern. At present, I employ a combination of Tailscale VPN and Cloudflare Tunnel to ensure secure remote access to my services. Tailscale is a VPN solution that utilizes the Wireguard VPN protocol to create a mesh network between all of your devices. I use Tailscale exclusively for its SSH feature when I need remote terminal access. On the other hand, Cloudflare Tunnel serves as my gateway to access web services by establishing a secure connection between my server and Cloudflare’s network. Utilizing a Cloudflare tunnel offers various additional benefits, including pre-configured SSL certificates, a Zero Trust approach, and the flexibility to employ a custom domain name for all my services.
